|
|

Making a star projector |
Commercially available star projectors: A variety of small planetarium projectors are available commercially. Some of these are excellent for the small planetarium. Two examples can be found below. The cheapest option is the Discovery channel projector displayed here: http://shopping.discovery.com/product-28605.html?jzid=40600502-1-0 If the link doesn't work search for "Discovery Star Theatre Home Planetarium." You get a negative projected image, but it will provide more light inside the dome for the little kiddies and it's cheap (approx. $30.00 US). MMI Corporation sells a variety of small projectors including a self-contained setup which includes a 10-foot diameter dome. We think our dome is better (and larger) but the projector might be worth looking at. Click on the link and download the "Planetarium" catalog for more information. http://www.mmicorporation.com/catalog/catalog_dwnld.html STARLAB planetariums (the inflatable kind you may have seen) also include a projector. Learning Technologies has just come out with a new high-tech version as well. They are pricey, but the are the standard for small portable planetariums. http://www.starlab.com/slproj.html Our Homemade Planetarium Projector#1: Students Josh Santos, Robert Johnson, and Barry Parker completed this fixed projector as a project in 2004. It consists of a light bulb held in the center of a plastic sphere, through which they drilled holes in the patterns of the stars. We don't have a writeup yet but if you really want more details, drop us a note and we'll try to oblige.
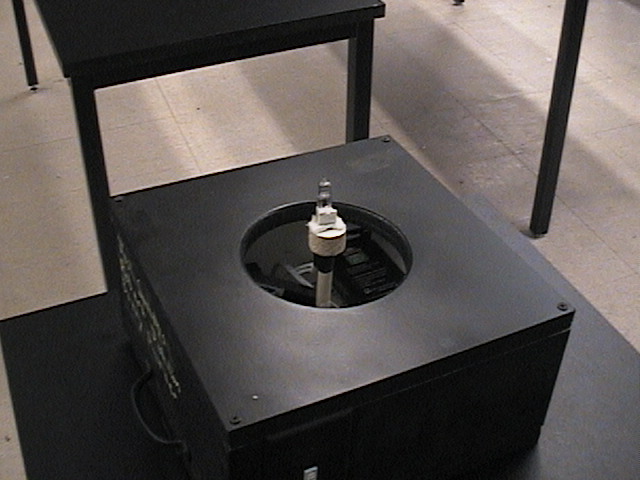
Projector #2:
Your objective here is to build a device that meets the following requirements:
The entire apparatus should be rotatable along the long axis of the cylinder. The entire apparatus should be able to tilt to different levels between 0 and about 45 degrees. Light from the bulb should not illuminate the bottom of the cylinder, no matter what the orientation. -The instructions here will achieve these goals:
1.
Cut a piece of dowel rod about a centimeter shorter than half of
the projector cylinder. Mount the light bulb socket to the top of
this rod by using glue, screws or any other convenient means including
duct tape if necessary.
5. Next, if you want your projector to block off
stars not visible because they are below the horizon, build this
device using a small plastic container and coat hanger wire. Note: The small holes should be centered
on the sides, but the bottom slot should extend past the middle enough
to clear the central dowel rod.
7. Bend a piece of coat hanger wire so that it acts as a support for the box. Begin by making an arm support for one side, then wrap the coat hanger around the dowel below the level of the box. Bring the wire up to the other side and use it to support the other side of the box. The top edge of the box should be level with the center of the light bulb. Secure the coat hanger to the dowel rod with duct tape.
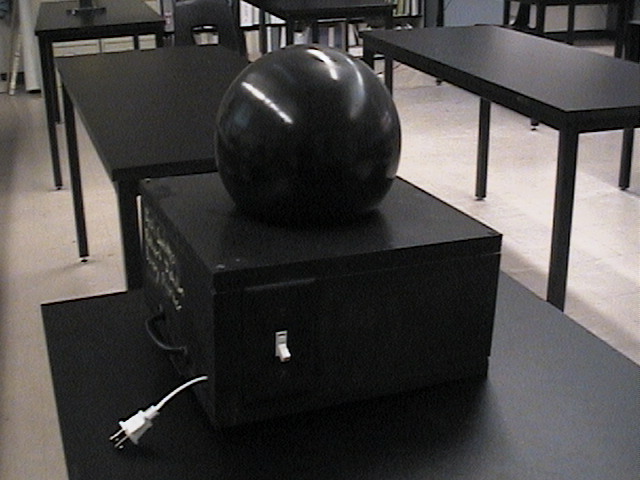
8. Test fit the projector cylinder by putting it on top of the light bulb assembly. If everything fits, you should be able to turn on the light bulb and rotate the projector cylinder 360 degrees without catching any wires, etc. 9. The last step for the basic projector is to
mount the turntable bottom on a piece of plywood, and then attach
this via a hinge to a base. You can then tilt the entire assembly
and brace it with books or blocks to simulate different latitudes. Final steps: 11. When using the projector in the dome, the projector
should be mounted at the center of the sphere, at the height of the
top of the base ring. 12. Keep a spare bulb handy...and a flashlight for disciplinary problems ;-).
Click here for a printable version
|
Overview
Building a Dome
Desktop
2 Meter
5 Meter
Paint Your Project
Making a Projector
Using the Planetarium
Curriculum
Assessments
Resources
Safety
Feedback
Quick Links
Deer Valley High School Science Department
Contact Us
Site counter courtesy of www.digits.com This project was supported by a County Technology Academy Grant funded by the Dean and Margaret Lesher Foundation in cooperation with the Contra Costa County Office of Education. |