Optional: strips of
thin plywood, nuts and bolts.
Background
This dome is a 2v, or two-frequency dome.
Plans are not presented here to make this into a sphere, although
you could easily do so by adding additional triangles and continuing
the pattern (but where would you put it?). Two different triangle
sizes are used. An optional base ring lifts the dome off the floor,
and even makes it possible to add a door and ventilation system to
the dome.
Unlike smaller domes, only corrugated
cardboard is strong enough to support the weight of the dome.
Even though each individual panel is lightweight, in combination
all the
cardboard used would be difficult to lift at best. Cutting corrugated
cardboard isn’t easy and scissors are probably not the
best tool to use. In some cases, if you use box cutters to cut
one side
of the cardboard following a straightedge, you can fold the cardboard
along the cut and just snap it apart. Otherwise, turn the cardboard
over and fold it into a V-shape, then cut in the narrow channel
that results.
If you have access to a paper manufacturing
facility, sometimes cardboard can be purchased with one side already
made white for producing white cardboard boxes. Such cardboard typically
comes in 4 x 8 foot sheets, and you should take care not to bend
it until absolutely necessary in order to retain its strength. It
is entirely possible to build the dome out of scrap cardboard from
a variety of boxes, and a grocer or warehouse store probably has
lots of boxes they would be willing to donate to your project.
If you don’t have white cardboard,
you should paint one side of the cardboard white with any white
flat paint. See painting tips for other hints, but for now it is
best
to note that painting is probably best done before the cardboard
is assembled into a dome. The connecting flaps do not need to
be painted.
The optional thin strips of plywood and nuts and bolts probably should not
be used unless you intend to leave the dome assembled permanently. You will
need to cut two strips for each joint, and use 3-4 nut and bolt sets to create
reinforcing strips that hold the cardboard tabs together. Used alone, the nuts
and bolts will eventually pull through the cardboard.
Check out these cardboard rivets!
http://www.mrmcgroovys.com/index.htm
Procedures:
This dome uses two different size triangles. To create a dome with a radius
of 2.5 meters, construct the following templates for use in tracing triangles
on other pieces of cardboard.
1. The first triangle
is an equilateral triangle with each side equal to 1.545 meters,
or 154.5 centimeters. Do not leave any extra cardboard for connecting
flaps. This will be called triangle A. Make one of these. The measurements
of the triangles was determined using an online dome calculator at Desert
Domes. If you want to make a triangle using some other size,
simply multiply these dimensions by the factor you would like
to make the dome larger or smaller, or visit www.desertdomes.com
and
enter the new radius you would like to use. The reference to
desertdomes.com is used with permission. 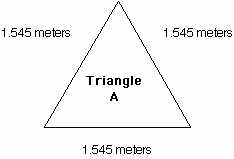
2. The second triangle
template is an iscosceles triangle, which means two sides are the
same length and the third side is different. In this case, the two
identical sides are 1.365 meters long, and the third side is 1.545
meters long (the same as triangle A.) This is called triangle B.
Make one of these. 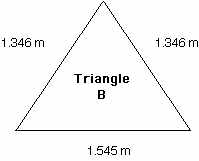
One way to make the template accurately for these triangles is
to use an old geometry technique. First, draw the base the triangle
with a pencil and ruler. Next, measure a length of string equal
to
one of the remaining sides, and draw an arc centered on one end
of the line you drew. Repeat on the other side, and where the arcs
cross
must be where the top of the triangle is located. 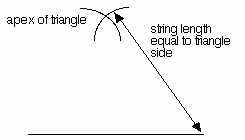
3. Once you have the templates made, assemble enough
cardboard to make the remaining triangles. You will need to make
10 A-type triangles and 30 B-type triangles.
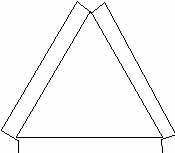
Each time you make a triangle, trace the shape from the template so that all
the triangles are identical. This will work better than measuring from scratch
each time. You need to leave about a 10-cm (4 inch) flap along each edge to
use when connecting the triangles together. A single completed triangle will
look like this.
Caryn L. Johnson reports that a 3-cm flap is better because the
clips reach closer to the trough between the flap and the triangle,
making a firmer connection.
The flap should not be substantially larger or smaller than
the giant triangular binder clips you will use to connect the panels.
The connecting flaps for this dome will need to be folded carefully
so they bend straight. In this case score the cardboard by drawing
a heavy line with a ball-point pen (not a felt-tip) which will
weaken the bending joint. Then bend the cardboard along the line
you drew
to make a flap or other junction. Don’t be afraid to practice
on some scrap before committing yourself to a more permanent
part.
Another good idea is to label the outside of the triangle with the type, A
or B; when you have a stack of triangles it can be difficult to tell which
is which. The outside of the triangle is the side the flaps bend toward
.
4. At this point you need to obtain binder clips,
the large black triangular kind you get from office supply stores.
Four per joint should be sufficient, and including the base ring
and having some spares, 400 clips will be required. One student
who built a larger dome with clips proclaimed, “You can never have
too many clips,” so consider buying extra for loss and
breakage and reinforcing weak spots. The advantages of clips
are ease and
speed of construction. Their primary disadvantage is they do
not take a lot of force to pop loose and slip. This is your best
choice
if you wish to assemble a temporary dome. When disasembled, the
parts fit nicely in a large box or behind a cabinet.
You should also read the painting tips page, because this is a good time to
paint the interior of the dome white if you intend to use it as a planetarium.
5. To assemble the dome using your chosen method
of assembly, begin by building a pentagon of 5 B triangles, with
the long sides all on the outside. Leave the last joint unconnected
until last to make the assembly easier.
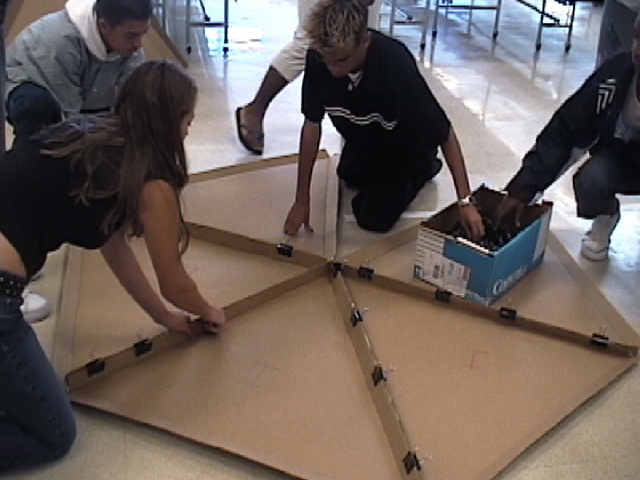
Connect the last two interior sides together to make a little “cap” or
bowl shape.
6. Make 5 more of these pentagon shapes. Set one
of the pentagons aside.
7. Set 5 pentagons into a circular pattern on
the floor, stand two at a time up on one edge.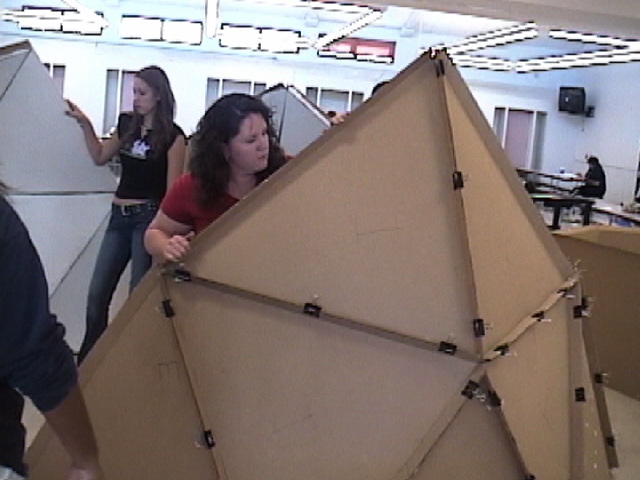
Next insert an “A” triangle
between them.
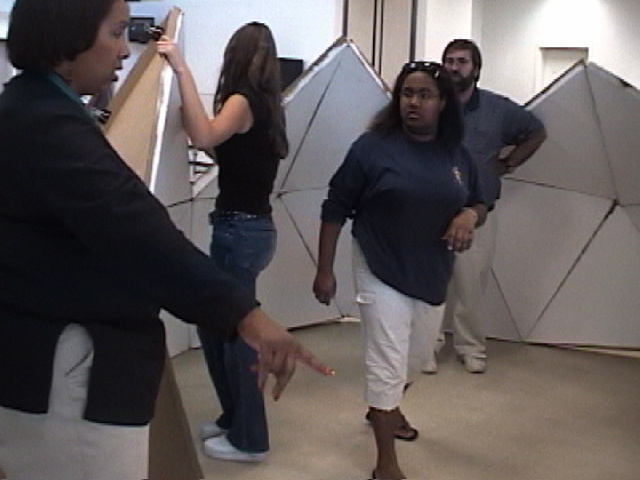
If
you are working alone, having lots of chairs around to brace things
is helpful.
View of 5 pentagons separated by “A” triangles, seen from above. “A” triangles
are black in this illustration.

8. Insert another “A” triangle into
the gaps at the tops of the pentagons, this time with the point of
the “A” pointing downward.

Finally, set the remaining “B” triangle pentagon into
the remaining hole and attach with clips. Again, two people working
at once is much easier, especially on the larger domes.
NOTE: If you are constructing a
base ring, make ten panels 1.545 meters wide, and as tall as
you would
like the dome to be off the floor (probably not more than a meter
would be best.) Don’t forget to leave extra flaps on the
edges and top to attach the panels to each other and the dome.

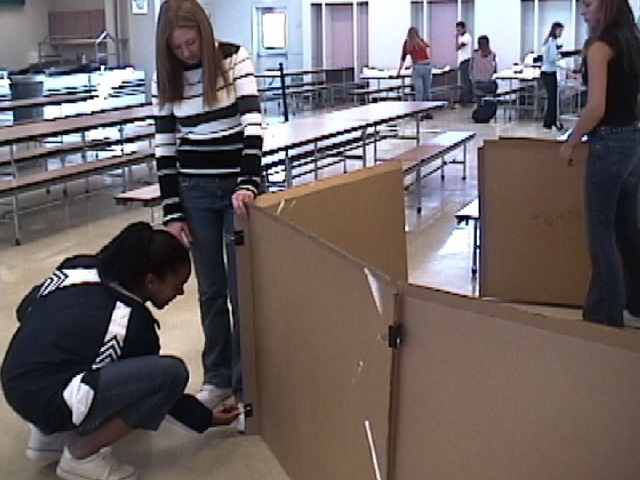
Construction tip: Assemble the dome first and carry it aside.
Then assemble the ring as shown in the photo. Then pick up the
dome and lift it as high as the ring's top as you carry it over
the edge. As the edge of the dome crosses over the edge of the
ring, you may need to pause to let people get in the ring.
In general you will need a minimum of 5 adults to carry the dome.
Unsupported triangles tend to slip out of the clips . Each adult
holds one triangle in each hand and stands in a "corner" of the
dome.
At least one other person then goes around the edge of the dome,
adding clips and aligning the panels.
This is what the finished dome will look like
. 
9. Ventilation.
Would you like to be closed into a cardboard box with 30 people for half an
hour with no ventilation? Neither would we. You can easily build a simple
ventilator with a floor fan and a large cardboard box. Simply put the fan
at one end of the box, add two or three interior baffles (painted black if
possible) to help stop the light leaks, and set the other end of the box
in a hole in a base ring panel. 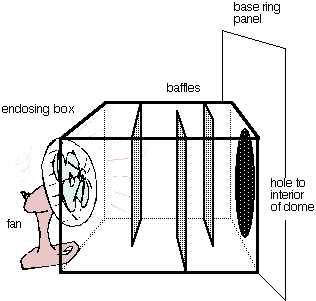
10. Door
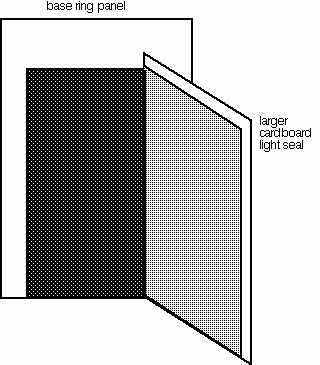
Make a light-tight door by cutting a “clubhouse” door
in a base ring panel (probably not adjacent to the ventilation
system for strength).
If you glue a piece of carboard on the door slightly larger than the size
of the door, the extra cardboard will serve as a light-blocking
seal. A loop of
string or a wooden knob can serve as a doorknob.
11. Plugging light leaks
If the room you are using cannot be completely darkened, light may leak at
the joints where the triangle corners meet.
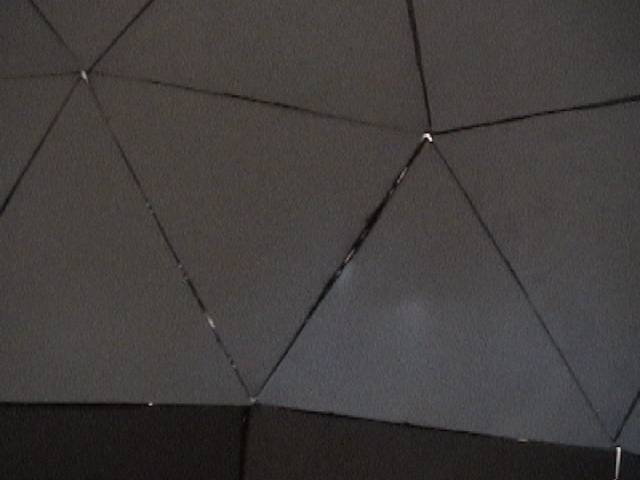
If
you discover this is a problem, you can either drape sheets over
the entire assembly or use poster board or aluminum foil
to cover each individual junction to prevent light leaks. Darker
works better. You might even consider taping the interior joints
with white tape if you intend to leave the dome assembled for a while.
Congratulations! You have assembled your 5 meter 2-frequency
geodesic dome!
Click here for a
printable version


